Guys, I am telling you: there is nothing like putting a pregnant woman in her new home. She’ll go into crazy mode nesting habit and get all sorts of stuff done ![]() Oh my friends, I am whipping this house into shape like nobody’s business – the basement renovation into a media room, setting up the girls in their new bedroom, oh and I haven’t told you yet that I am working on setting up my new office in the house….among (a few) other things. It’s like my brain wants this house 200% for when the baby arrives – never mind that most of these changes have nothing to do with the baby itself
Oh my friends, I am whipping this house into shape like nobody’s business – the basement renovation into a media room, setting up the girls in their new bedroom, oh and I haven’t told you yet that I am working on setting up my new office in the house….among (a few) other things. It’s like my brain wants this house 200% for when the baby arrives – never mind that most of these changes have nothing to do with the baby itself ![]() I am no foul though, I know that the burst of energy I have right now ain’t gonna last so I take full advantage of soon. Soon enough all you’ll find me doing is eating ice cream on the couch while watching re-runs of Ally McBeal.
I am no foul though, I know that the burst of energy I have right now ain’t gonna last so I take full advantage of soon. Soon enough all you’ll find me doing is eating ice cream on the couch while watching re-runs of Ally McBeal.
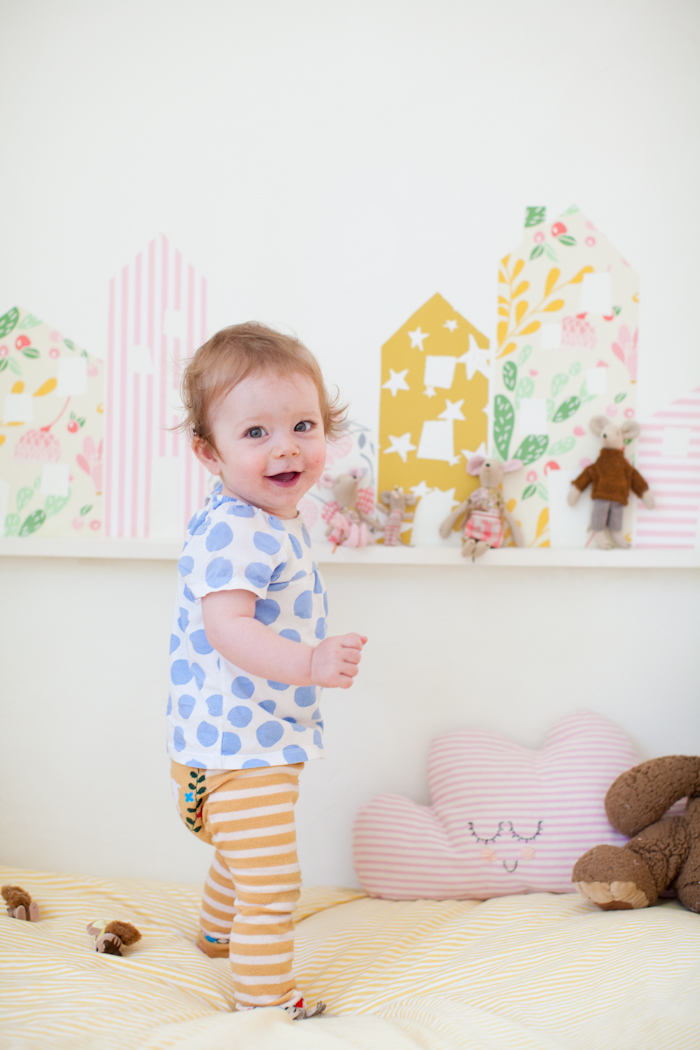
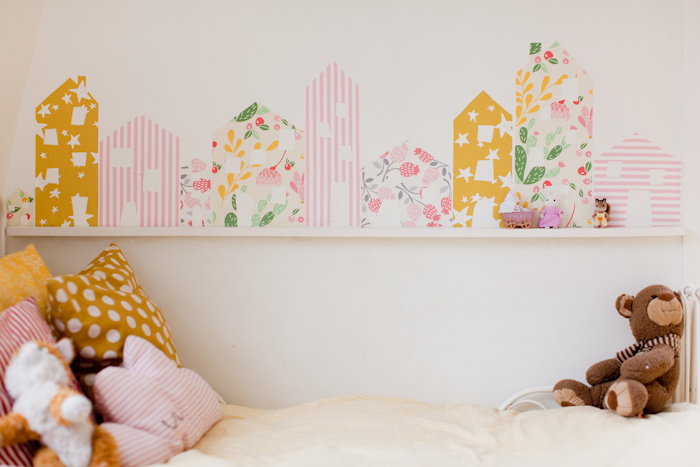
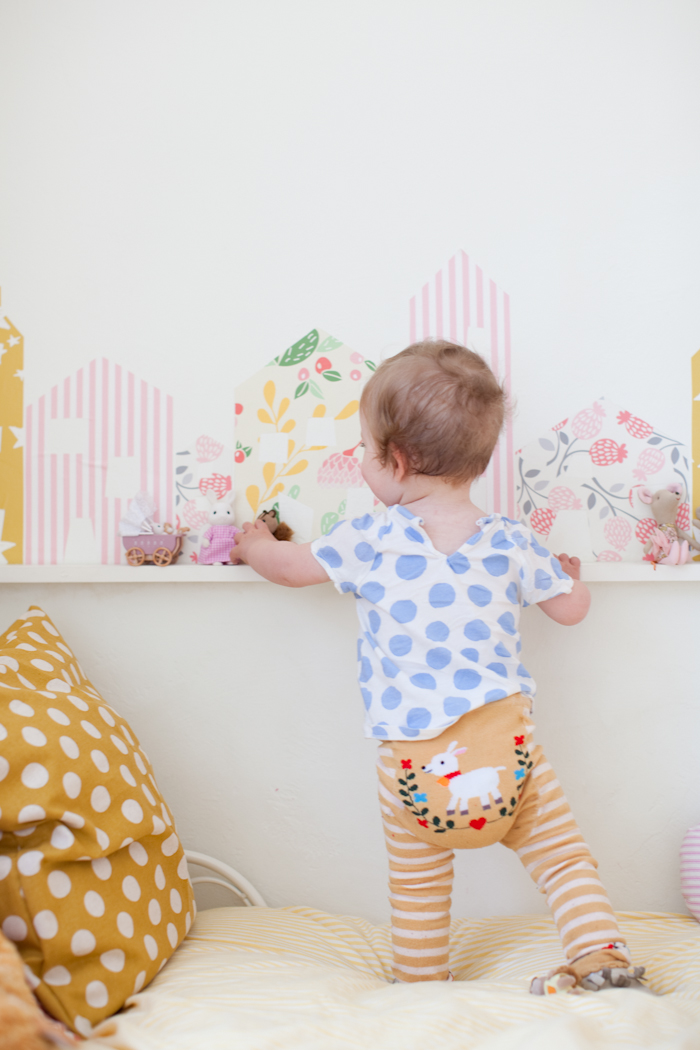
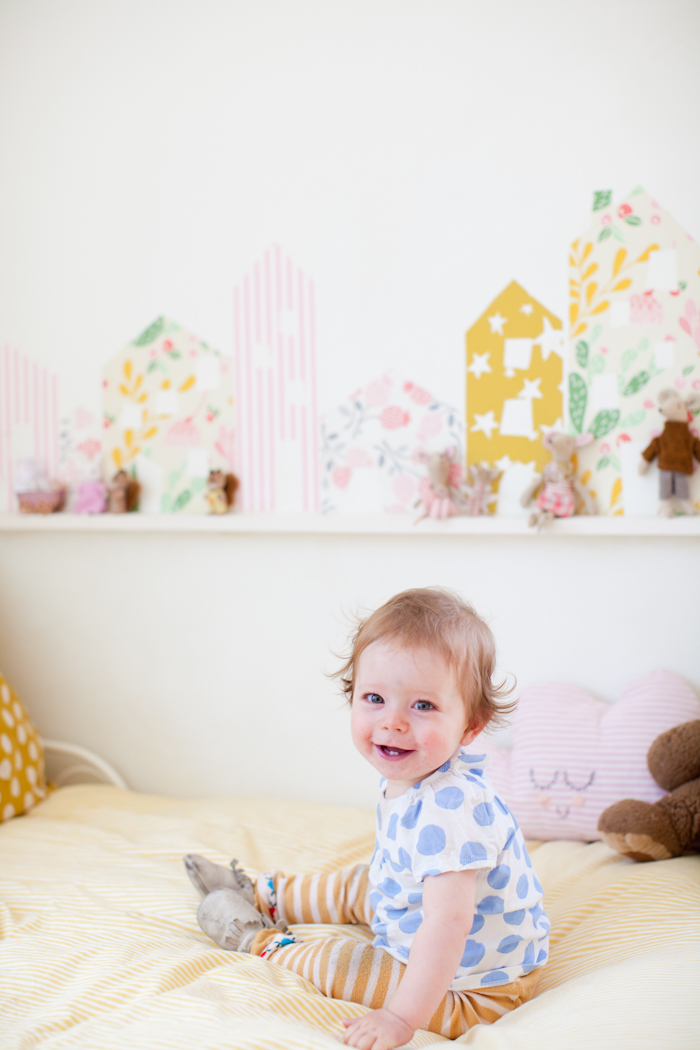
Anyhow. The big girls’ room is almost finished – a detail here and these and I’ll be sharing the full room with you in a couple of weeks- and today I want to show you this fun little row of wallpaper houses I put in their room using removable wallpaper from Spoonflower. It was so easy to set up (DIY how to at the bottom of the post) and is a major hit with the girls – it makes the whole room so cheerful and I love how it calls for their imagination!
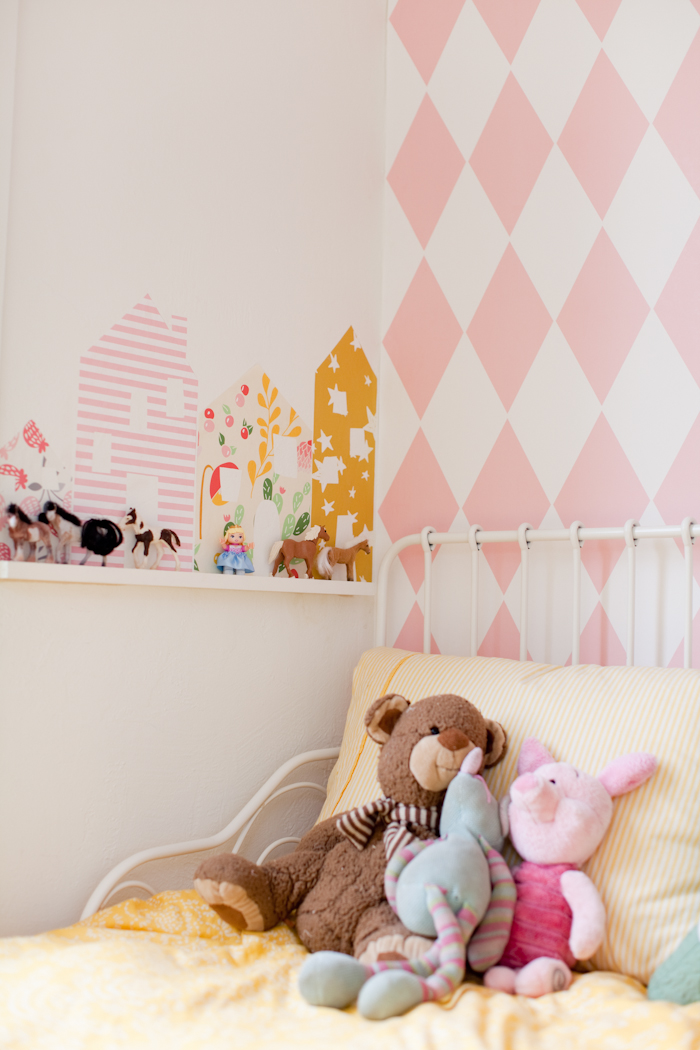


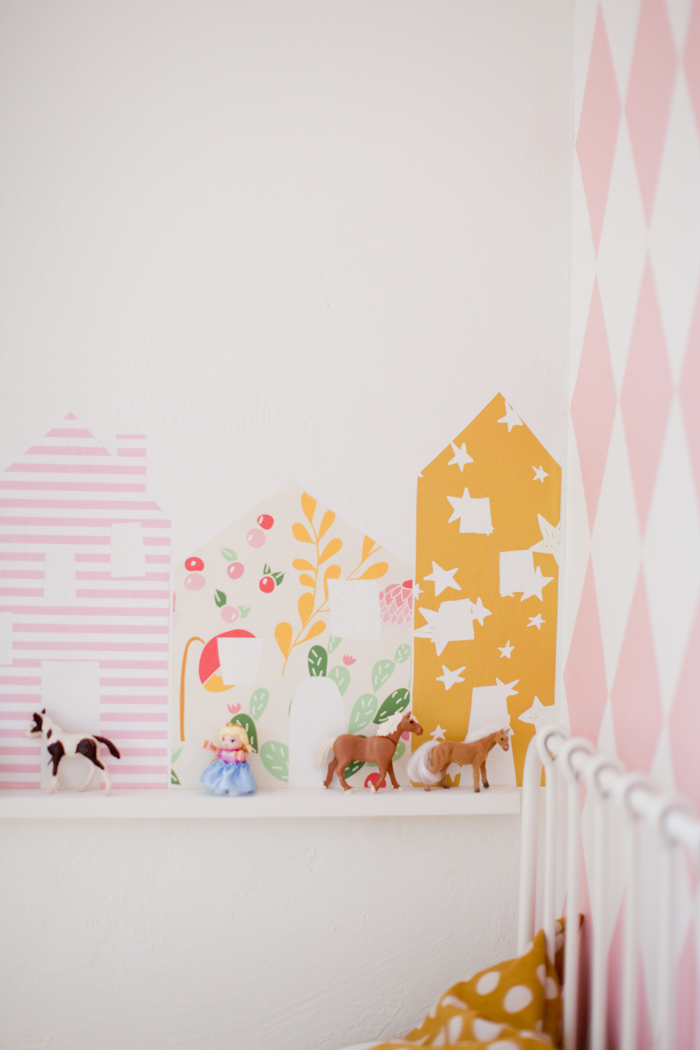
I set up a little wooden ledge right at the bottom the houses so that they can put their toys and pretend the houses form a little town. I often catch them making a little mouse go to school or a mama rabbit head to the market ![]() Olivia mostly displays her horse collection up there – that girl and her horses, unstoppable! Of course Freia loves to come to her big sisters’ bedroom and knock all of the toys down
Olivia mostly displays her horse collection up there – that girl and her horses, unstoppable! Of course Freia loves to come to her big sisters’ bedroom and knock all of the toys down ![]()

The best thing about this project is you can easily adapt it to your own space – just decide on the length of the row your need, pick the colors and patterns that go for your little one’s room and you’ll be on your way!
Because I wanted to use several patterns, I kept the houses very simple in shape. I simply hand-drew them and they are a little crooked but I love them for it. I went for a mix of gold yellows, soft and hot pinks, and bits of green and grey. I really love how it turned out! Spoonflower has so many options for patterns, and I even started to design my own – the wallpaper that has the bits of green and red is mine. So fun!
What you need
- Removable wallpaper – I got mine from Spoonflower and used my own California dream wallpaper design as well as the stars pattern, flower pattern and pink stripes pattern by other designers. You don’t need a lot of paper – I only had 1/4 rolls of each pattern and it was more than I needed for an entire wall!
- Pencil
- Scissors
- Stud in the length of the row you want to make – I used 2″x 1″studs. Make sure the stud is very straight so it will go flush against your wall!
- White paint and primer (optional)
- Liquid nail & caulk gun – or screw and anchors if you prefer.
What you do
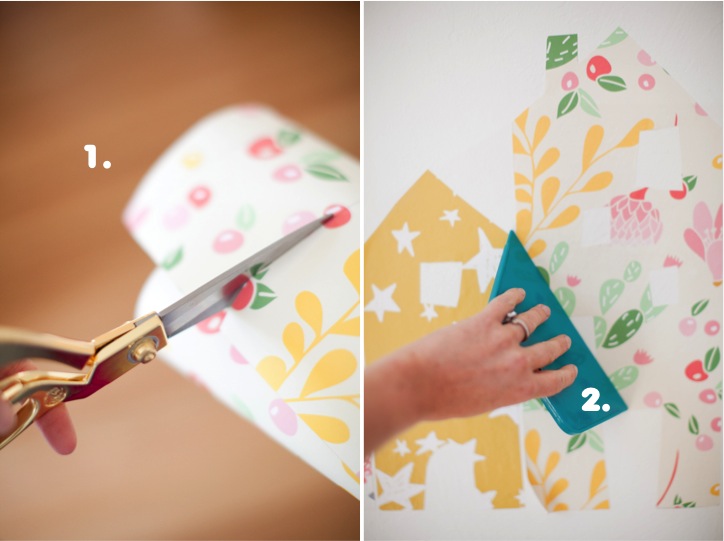
1. Hand-draw your wallpaper houses and cut them out with scissors. Don’t worry about making perfectly straight houses – crookedness adds whimsy ![]() My houses vary in size, the smallest ones are 3 inches tall and the tallest about a foot tall. Cut out doors and windows.
My houses vary in size, the smallest ones are 3 inches tall and the tallest about a foot tall. Cut out doors and windows.
2. Apply your houses on clean wall – the method will vary depending on the removable wallpaper you use, for mine I activated the glue using water. Make sure to get rid of any air bubble as you go. I slightly spaced out my house, 1/4 of an inch or so.
3. Cut your wood stud in the length of the row of houses you are making, and as needed prime and paint in the color of your choice. Using a caulk gun, apply liquid nail all along the edge of the stud.
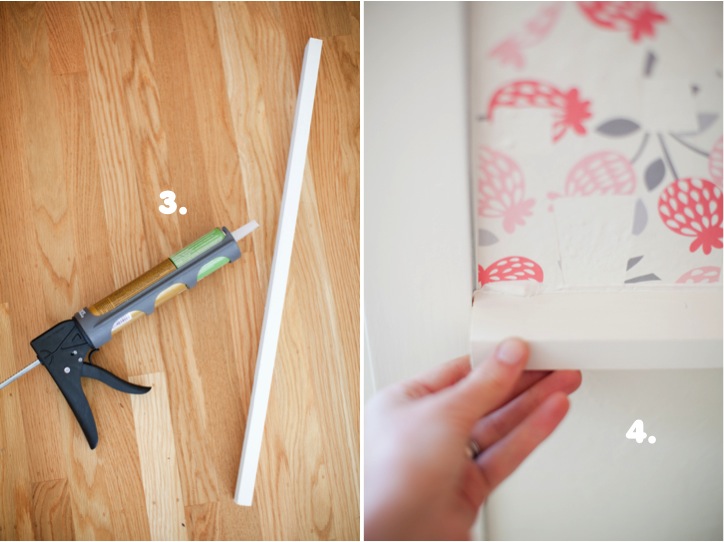
4. Apply the stud right below the row of house, press and wipe off any excess liquid nail. Let dry. Et voila – you’re done!
PS: If you don’t want to use liquid nails, you can screw your stud to the wall. Make sure to put anchors in your wall and pre-drill wholes in your stuff before screwing the stuff down. If your stud is less than a couple feet, 2 anchors should do – if any longer, make sure to use one screw every foot or so. Cover with a wood plug or wood putty/paint so you don’t see the screws.
Disclaimer: Spoonflower partnered with me for this project and provided me with a few rolls of wallpaper. I received no compensation. All ideas and thoughts in this post are my own. All pictures by This Little Street.
You might also like:
The post DIY row of wallpaper houses – removable! appeared first on This Little street.


